2022 Temperature Quilt: Here we go

So in late October I saw my first temperature quilt. I had heard of crocheted temperature blankets. But I don’t crochet any more (or at least, not in years). Although, truth be told, every time I donate my extra yarn and hooks, I literally decide 3 months later to crochet something. Right? Who’s with me?

Imagine my delight when I realized people could do a temperature quilt! Down the rabbit hole I went. So many beautiful examples. So many patterns. So many colorways. Some document just the high temp. Some the high and low. Some even include the mid-range temp and/or the weather. Oh the possibilities…it was a fun diversion on the long car ride to and from Syracuse for family weekend.

If you’re not familiar with temperature quilts, it’s a year-long project where you use the temperature each day for a particular city (I’m choosing to do my current hometown, Cincinnati), to determine which fabrics you put in your block. Fun, right? I love that the weather – incredibly unpredictable right now, will determine how this quilt comes together.

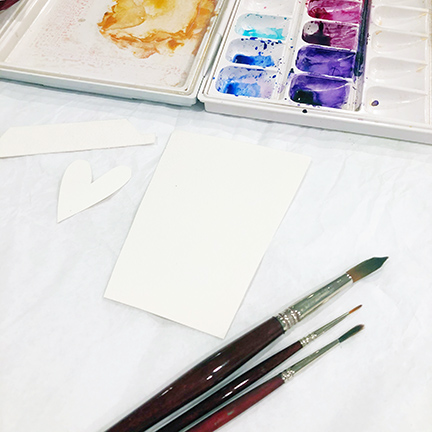
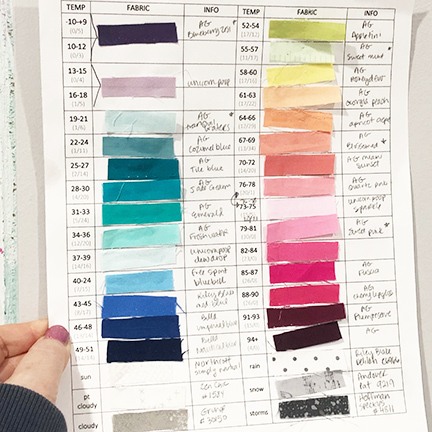
I’ve made a chart with temperatures ranging from 0 to 95 degrees with 3 degree increments(although over the last few years, we’ve had very few temps 15 degrees and lower, so that range is a bit larger). I’ve selected fabric for each 3-degree range, for a total of 19, and 6 more for the weather. With my research done, and my fabric picked, I needed to choose a pattern.

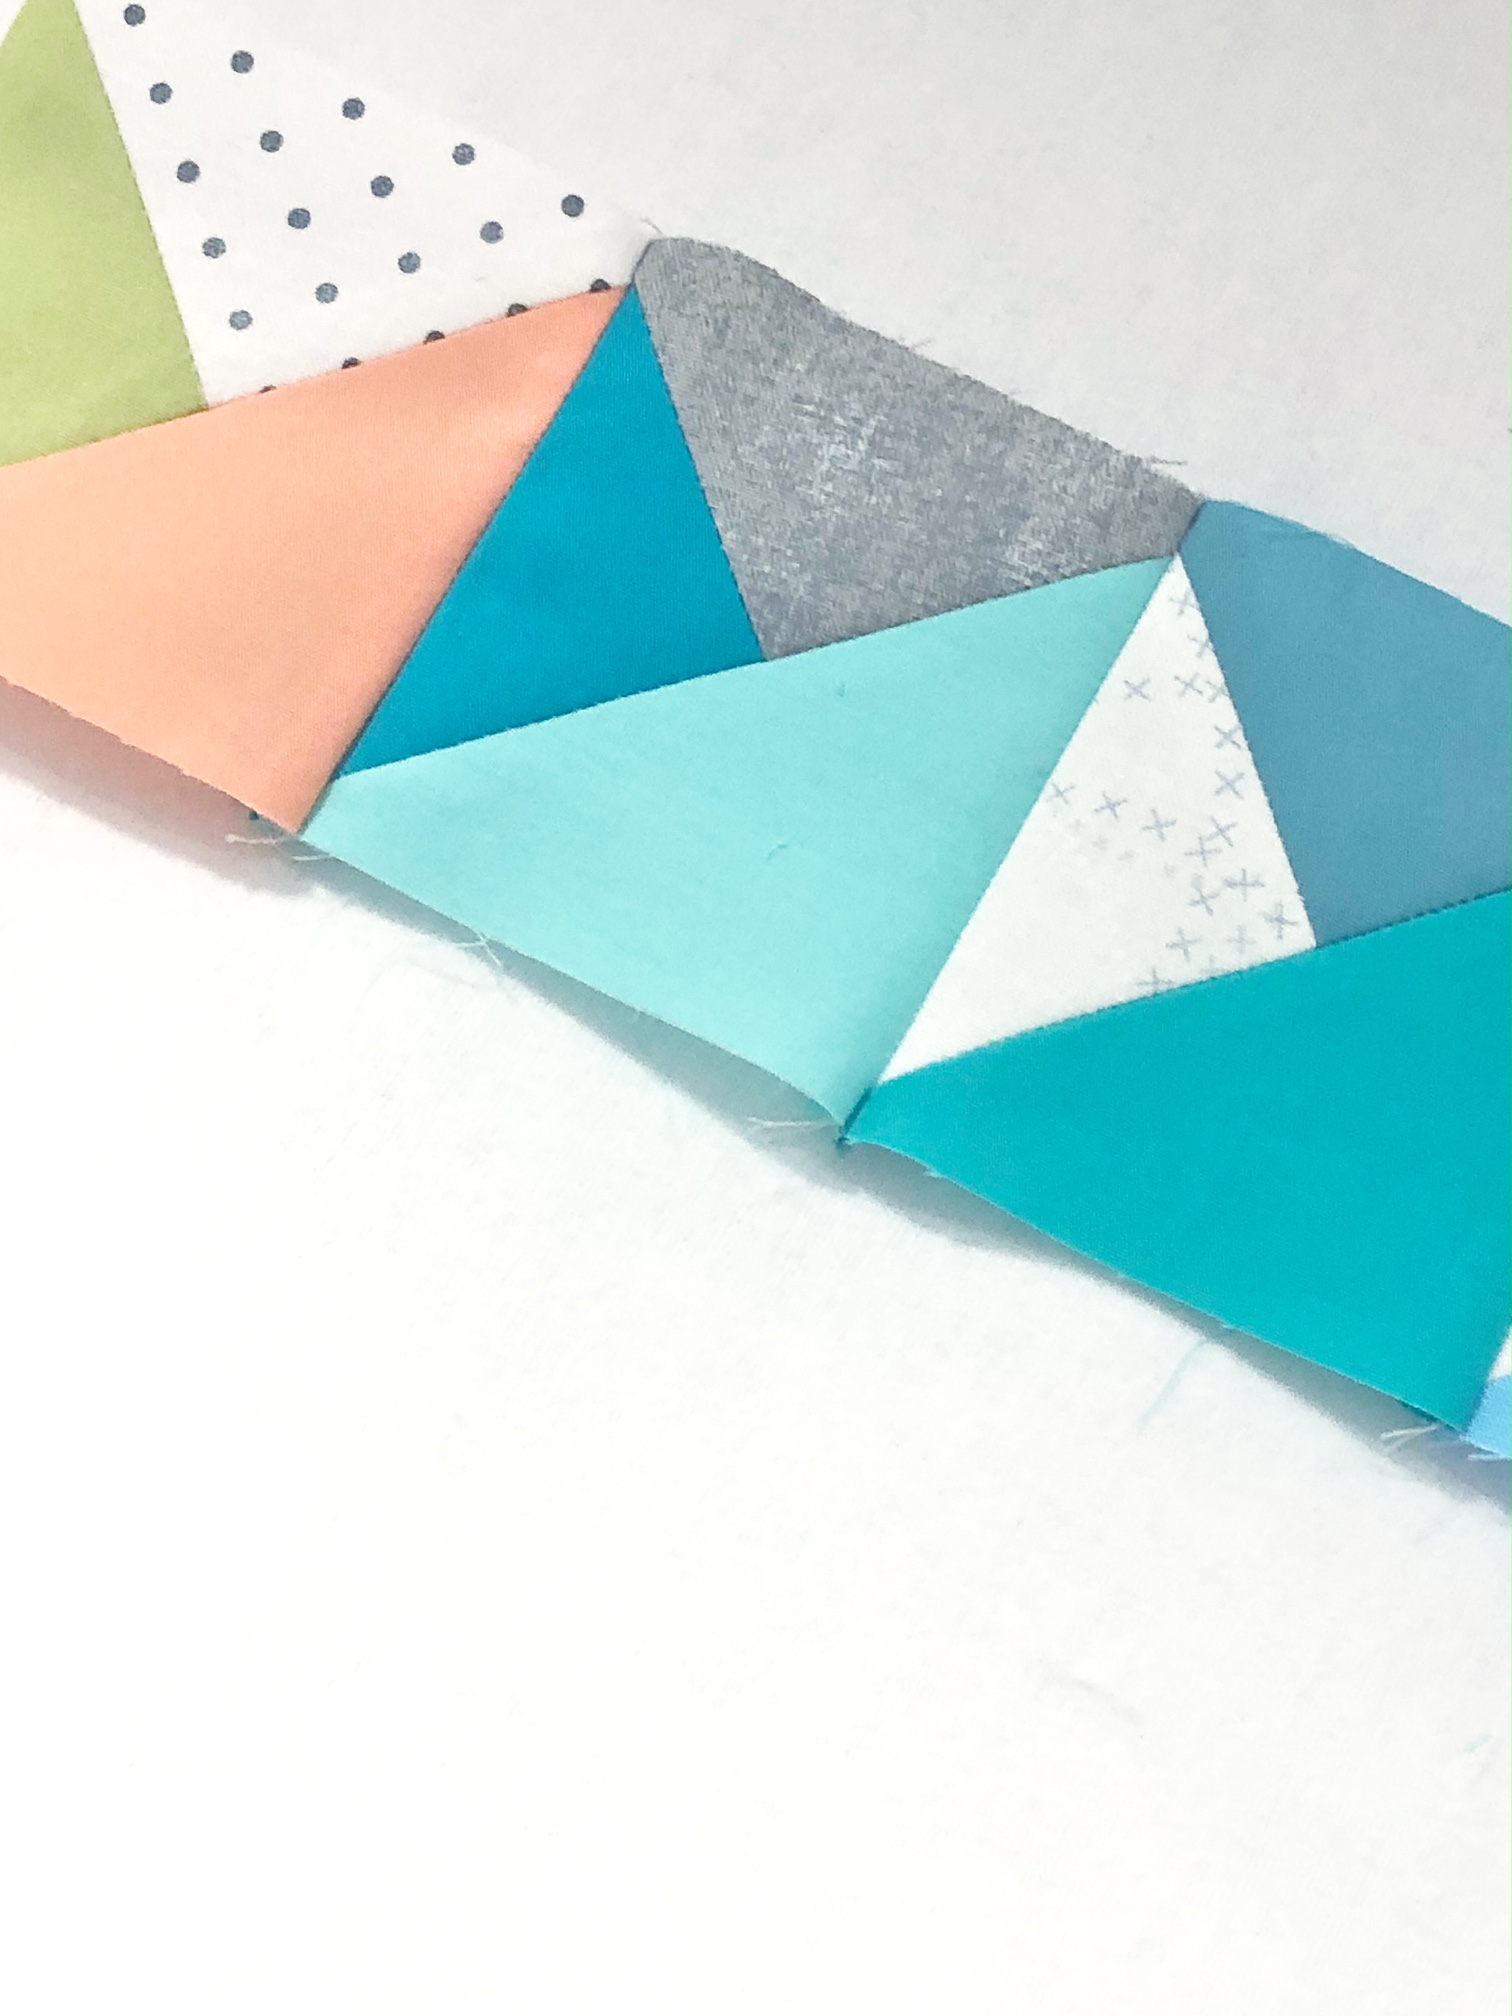
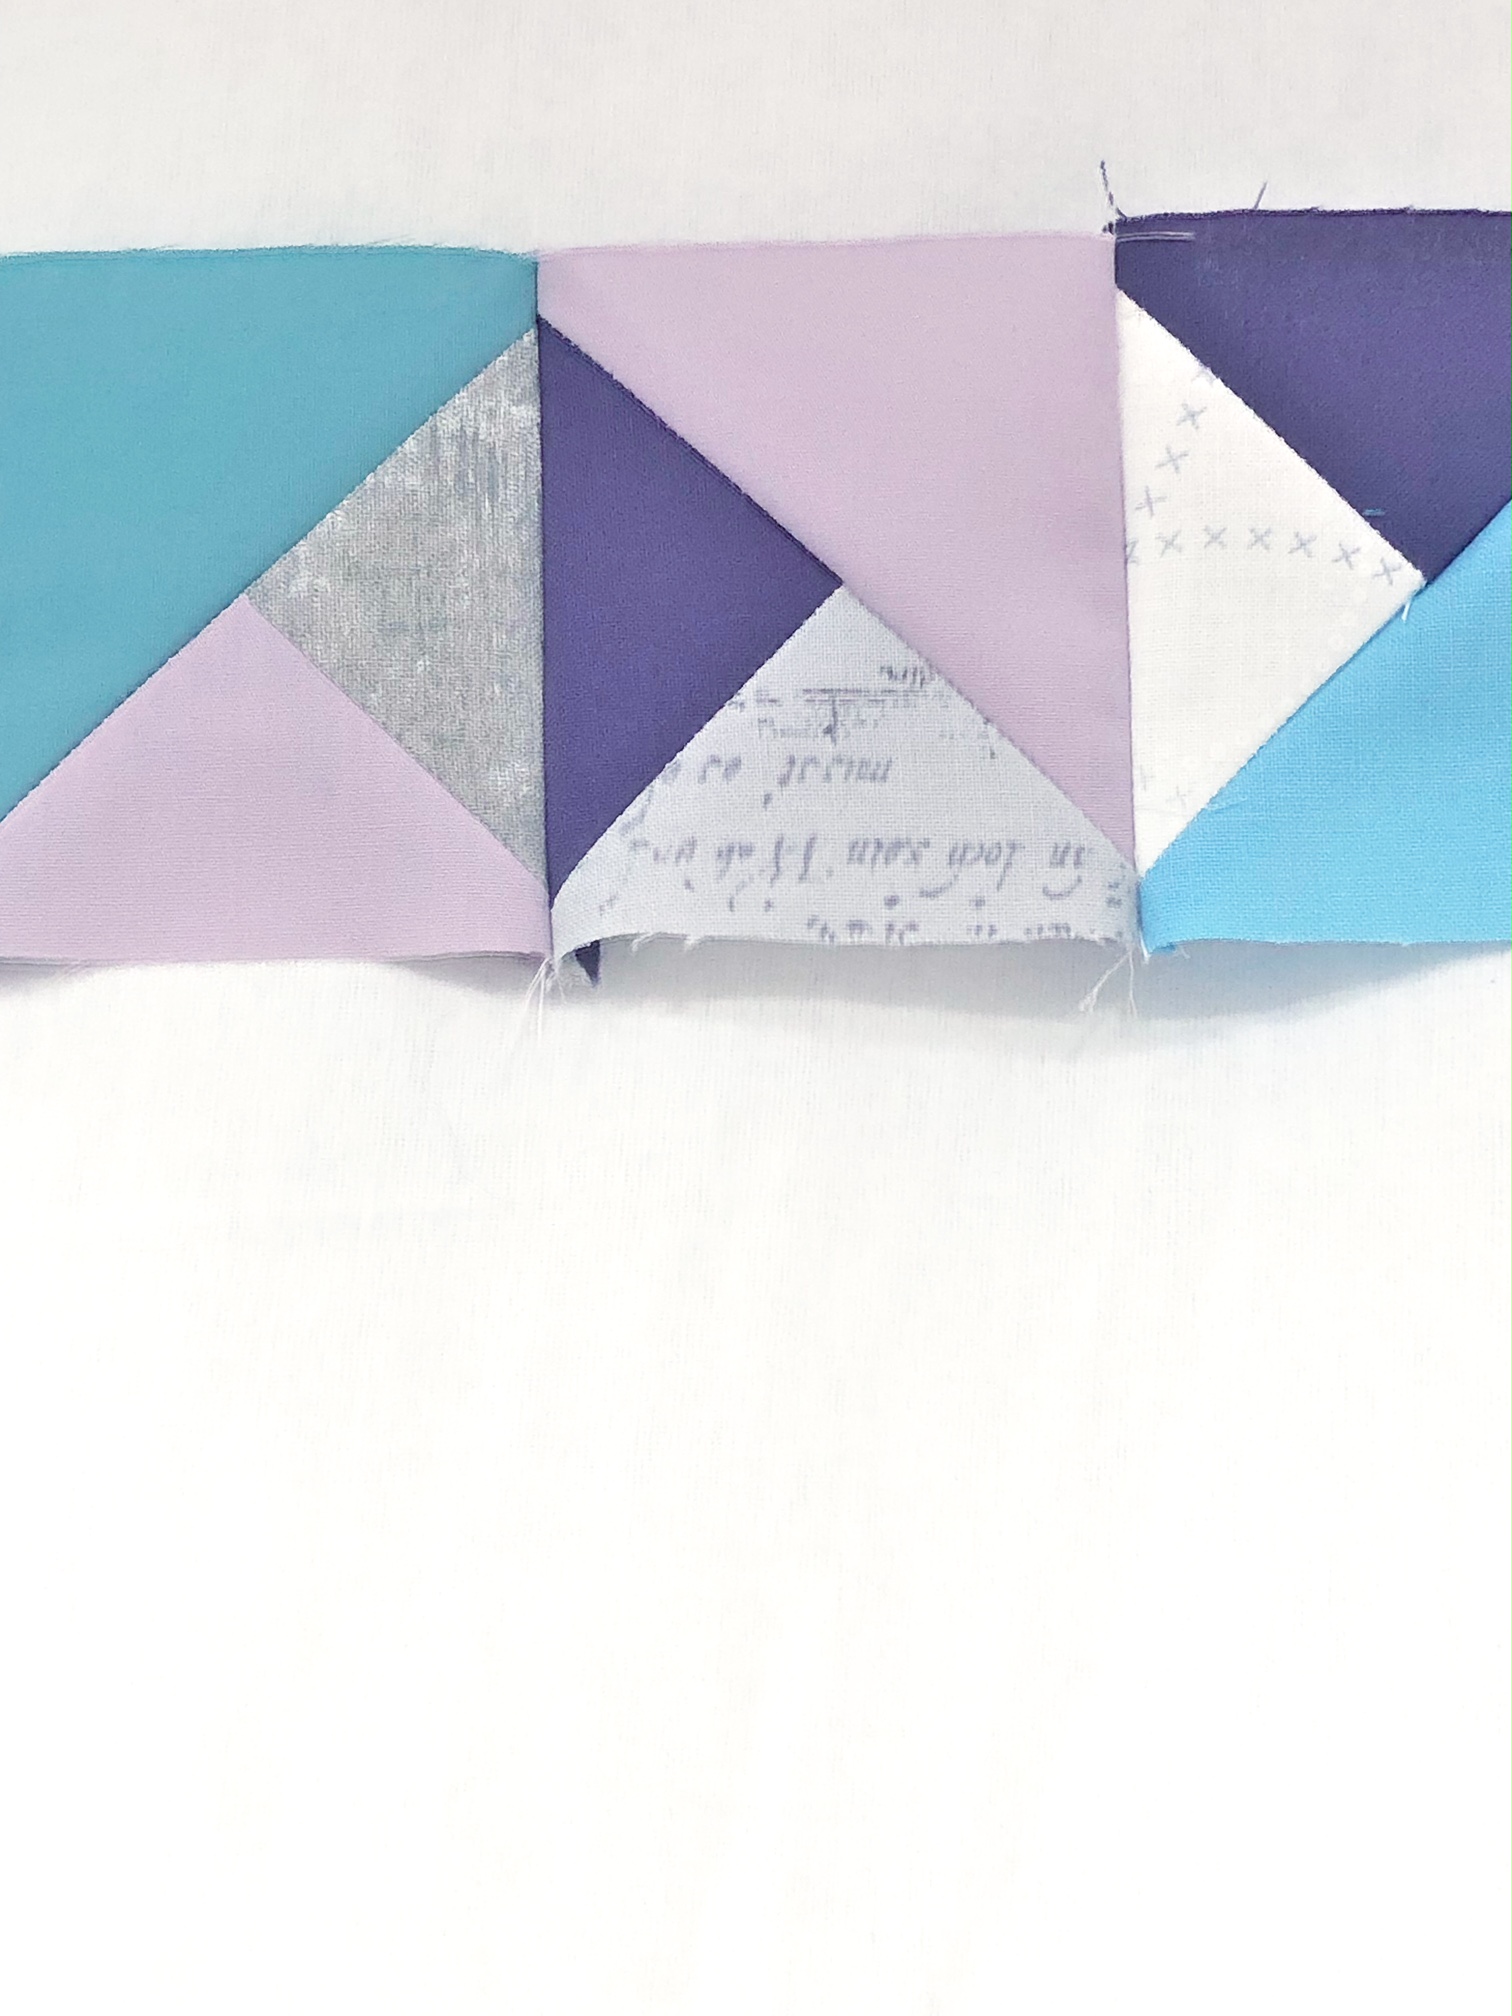
With January 1 just around the corner, I’ve finally committed to a design. (Cue the trumpet sound.) I pinned this lovely quilt from Noodlehead that I’m using for my inspiration. I think it’s called a Split Quarter-square Triangle – or maybe just a Quarter triangle? I don’t know. Here’s what the blocks look like:

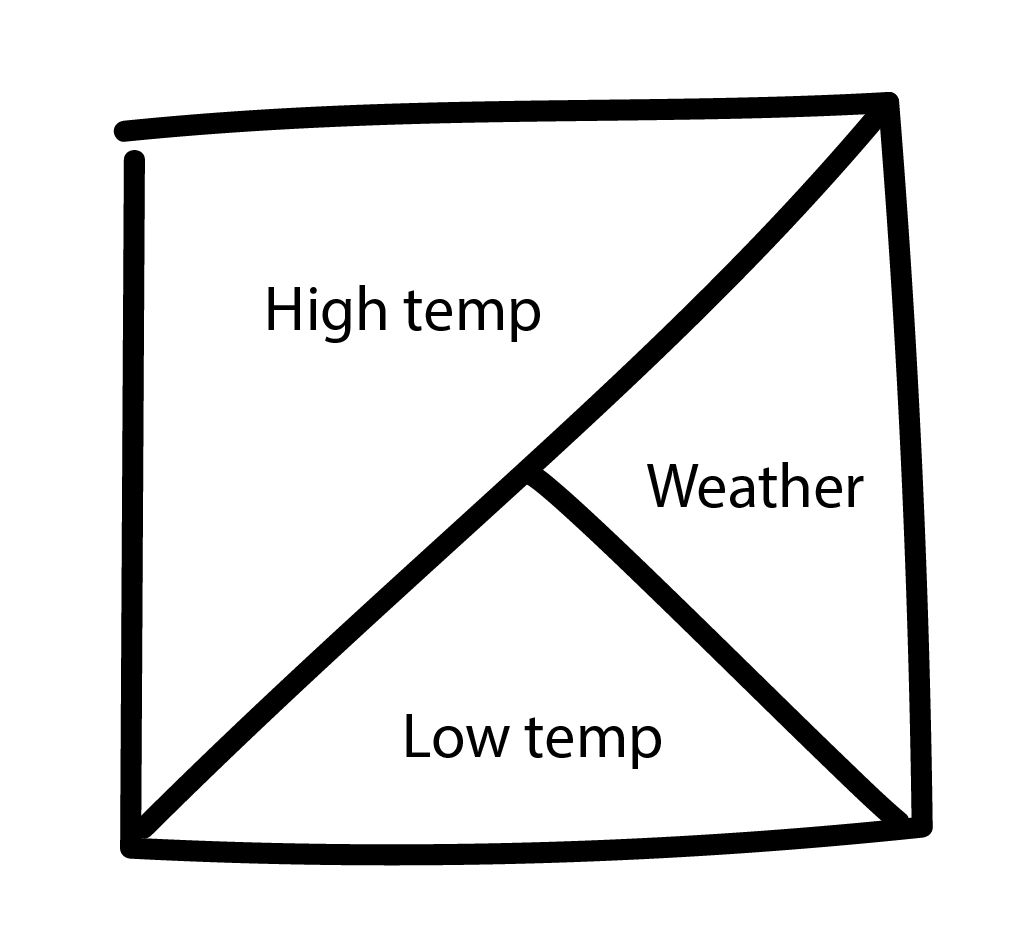
I’m using mostly Art Gallery solids (with a few Tula Pink Unicorn Poops thrown in) for the high and lows. And I knew I wanted to include the weather (Sunny, partly cloudy, cloudy, rainy, snowy, stormy,) and am using low-volume whites/greys for the weather. Here’s my fabric plan:

My goal was for the finished block to be 3 inches, but math isn’t my thing. You lose more than .25 inch on the diagonal quarter half squares (who knew)?? So, My squares will finish at 2.5 inches. I’m planning 18 columns – and 22 rows, for a final size of 45 X 45, which is a bit smaller than I’d like. So, I’ll likely be adding a border and a legend to make it all just a bit bigger.

Here’s another fun thing: I’ve never been much of a weather girl. I usually figure I’ll know it when I see/feel it LOL. But it’s been fascinating this first week to pay attention. We started the week at 64 degrees for the high, and one day had 18 as the high. We’ve had rain, partly cloudy, cloudy and snow. I think it’s going to be quite fun to watch the year progress in weather. Hope you enjoy following along!

Cheers!


Ethiopian Chicken Curry

I’ve been working on perfecting this recipe for a while now. It’s an attempt to copycat one of the yummiest lunch spots in downtown Louisville, Addis Restaurant. When you walk in the door – the smell of this dish just hits you. Savory, spicy deliciousness. Since I no longer live in Louisville, and Covid limits travel, I don’t get to satisfy my craving very often. So I decided to try to make this at home. Today marks my third attempt and I must say, it’s a successful one! It’s not perfect – but the color and texture are spot on. The flavor is really close. And as promised on previous posts, I’m sharing the recipe in case you’re interested. Know that I am NOT recipe writer – but I did my best to share how I made this.

Ingredients:

    • 3 pounds of boneless chicken (most recipes suggest thighs, but I’ve used both thighs and breasts)
    • 4 cups of onions, coarsely pureed
    • 6 Tb butter, divided
    • 2 Tb olive oil
    • 2 Tb minced garlic
    • 2 Tb grated ginger
    • 1/4 c. Berberre (this is an Ethopian spice – you can get on Amazon if you don’t have access to a local ethic grocery or spice shop)
    • 2 black cardamom pods
    • A pinch of fenugreek seeds
    • 1 tsp smoked paprika
    • 2 Tb lemon juice

Directions

    1. Chop the onions and pulse in a blender until you have a coarsely textured puree.
    2. Over medium heat, melt 2 Tb butter and the olive oil in a dutch oven or large pot.
    3. Add the onions, stir to coat. Reduce heat to medium low, cover and cook for 40 minutes, stirring occasionally.
    4. Meanwhile, cut the chicken into chunks. Cover with lemon juice. Let sit a room temperature until you’re ready to add it to the pot.
    5. Move the onions to one side of the pan. Turn heat up to medium. Melt 2 Tb of butter in the cleared half of the pan. Add the cardamom pods and fenugreek to the butter. Cook for 1-2 minutes until you see little bubbles forming around the pods.
    6. Add the ginger and the garlic. Cook for 1-2 minutes more.
    7. Stir with the onions, reduce heat back to medium low, cover and cook for 30 minutes.
    8. Melt 2 Tb of butter. Add the Berberre and smoked paprika. Stir to combine. This may be really thick. Add in up to a 1/4 cup of water, if needed to make it not stick. Cover again, reduce to low and cook 20 more minutes.
    9. Add the chicken. Cover. Cook for 30 more minutes, or longer if desired.

Serve with pita, rice and a salad.

Note: Today I shredded my chicken instead of cubed it. I wanted to try this texture, so I cooked it on low for 3 hours, stirring frequently. Usually it’s served in large cubes. I liked the shredded chicken because it allowed me sop up more sauce.

Also – this is really spicy. You can control the heat with how much smoked paprika you add. Take it out completely for a much less intense fire. If you like it sweeter, you can add a little sweet wine to the recipe when you add the berberre.


Funday Friday: Scrappy Fabric Galentine’s

Hello friends! It’s Friday and that means it’s time to put on your party hats and kick up the fun.

Let’s talk Galentne’s. Yep, ya heard me: Galentine’s  let’s face it, February 14 isn’t just for Cupid and romance. It’s a time to celebrate love and kindness and friendship. Your gals. Your pals. Your tribe.
And let’s really face it: if I made a sweet little Valentines like one of these for my hubs he’d be l ike “Uh. It’s cute?” Right?

I am taking a handmade journal class with Wendy Schkolnick Solganik (@willa.wanders over on Insta) and have been introduced to the wonders of Pellon 72F double-sided fusible stabilizer. I’ve been using the lightweight double fusible interfacing for appliqué for the better part of a year now, but this stuff is super thick and well, stable. (Amazing how that works!) While I bought it mostly to make a journal cover, I thought it’d be fun to try using it for other things. Like some Valentine’s.

Here’s what you’ll need if you want to follow along:

      • Fabrics for the scrappy top
      • Fabric for the back
      • Fabric to stamp
      • stayzOn ink – or other permanent ink
      • Pellon Peltex 72F double-sided fusible stabilizer
      • Pencil
      • Scissors
      • Iron
      • Buttons, ribbons, etc. to decorate
      • Sewing machine or needles and thread to hand stitch

I bought this vintage-looking fabric last year to make some masks with and never did. If you know anything about me: you know that I’m more of a bright and happy colored kind of girl. But peeps, my soul wants to soft and vintage-y and dainty. So I bought this fabric….and the promptly didn’t make it into anything. It’s PERFECT for this project however. I did want a scrappy look, so even though the fabric looks like several little pieces of fabric together, I decided to cut it up so that I could stitch it back together.

Let’s take a look at the process:

  1. Cut a few squarish shapes from your Pellon (mine were about 4 inches x 5 inches).
  2. Draw a heart shape on one side as a template for you to cut later.
  3. Take your fabric scraps and arrange it in a pleasing design and iron in place. A few notes:
    • I laid this out on the side where I didn’t draw a heart so I could cut it after I stitched the pieces together.
    • I overlapped my pieces a bit to make sure that I didn’t have any exposed pieces of Pellon showing after I ironed it.
    • I ironed on my kraft mat because the Pellon is double-sided fusible. If you don’t have a craft mat like this, you can use freezer paper – something to ensure that you don’t stick the Pellon down to your ironing board.
    • Stitch the pieces together using decorative stitches. I used my free-motion embroidery foot on my sewing machine. You could also use decorative hand stitching.
    • Cut the heart shape out.
    • Iron your backing fabric on to the heart. I did stitch once all the way around to secure the backing fabric.
    • Trim the excess backing fabric.
    • Embellish how you like. Here’s what I did:
      • I took some duck cloth and ripped it to get those lovely frayed edges
      • Using StazyOn ink, I stamped some sentiments directly onto the fabric.
      • I stitched them to my heart using a contrasting thread. (Truth be told, I wish I had done this all over. I was trying to go for that calm, simple, scrappy vibe. But I’m fighting my desire to see that messy doodled line here!!)
      • I created a little felt flower to add to the heart as well. To attach, I crazy stitched the center of the flower.
      • You could add trim, pins, buttons – get creative!

Hope this inspires you to create something sweet and fun for all the lovely ladies in your life whom you appreciate. Until next time – happy creating!

Funday Friday: Coffee Cup Gift card holder

HELLOOOOO! And welcome to my first official Funday Friday. I thought I’d kick this one off with a downloadable freebie to make a gift card holder. With Valentine’s Day coming up, I thought these would make fun little gifts to send to some friends in their Kindness Kits. If you’d like to download the template and follow along with these instructions, you can do that here.

As you probably know by now, I like to dabble in lots of different mediums, so I thought it would be fun to make this template three ways. I’ve made this gift card holder using scrapbook paper with my favorite glue, watercolor paper with machine stitching and felt with hand stitching.

Cardstock gift card holder

Let’s take a look at the easiest, no-stitch scrapbook/cardstock paper version. All you need is some paper, scissors and your favorite adhesive, a black pen — and if you’ve got a circle tab you can use that too! Don’t have a circle tag? No worries – you can skip it or cut a circle out of a piece of contrasting paper. For this one, I used two pieces of each part of the template except the heart (I only used one):

  1. Cut the template shapes from the downloaded file and trace on to your card stock or paper.
  2. Cut two of each shape except the heart (you only need one.) I used two pieces of card stock for the base to stabilize it and because I wanted the lid to cover both sides of the cup base.
  3. Adhere the two cup bases together.
  4. Adhere the lid to one side, with about .25 inch, flip it over and adhere the second lid to the back, lining it up to the front.
  5. Adhere the sleeves onto both sides. Make sure to only add adhesive to the very left and right edges of the sleeve on the front, so you can fit the gift card through.
  6. Adhere the heart to the circle tag, if using, and add to the sleeve. I used a bit of 3D tape to pop the heart up a little, giving it a bit of dimension. You could certainly stop here, but I went in with a Micron pen and added some doodling and lines around the the whole thing.
  7. Slide the gift card into the sleeve!

Watercolor paper gift card holder

For this one, I pulled out my favorite watercolors and used my sewing machine. It came together pretty quickly.

  1. Trace and cut one piece of each shape out of your water color paper. (You can also trace first, paint and then cut). Because I’m using 140# cold pressed paper, it’s pretty stable, so I didn’t use two pages. If you want to hide your stitches on the back, feel free to cut a second base and lid and glue after you’re done stitching. But I love to see the stitching on both sides!
  2. With your favorite watercolors, paint designs on each piece. Consider how they will work together once layered.
  3. Once dry, I outlined my designs with a Micon pen.
  4. Take it to your machine and stitch away. First, stitch the heart to the sleeve. Then stitch the lid to the top, overlapping about .25 of an inch. Finally, stitch up the sides of the sleeve. I actually added decorative stitching all the way around, but you could add it just to the sleeve. I love how the stitching mimics the doodling on my scrapbook paper version.
  5. Slide the gift card into the sleeve!

Felt gift card holder

I used hand stitching on this version because it’s just so adorable. You could certainly stitch it by machine – or even use fabric glue if sewing and stitching isn’t your thing.

  1. Trace and cut shapes out of felt. I used a “premium” version for the cup base which is pretty thick. I cut one piece of each shape except the lid – I cut two of those. Again, I want to hide where the lid overlaps the cup.
  2. Add any decorative stitching you’d like. Here’s what I did with mine:
    • Stitched the heart to the sleeve using a quick little whip stitch.
    • Added a blanket stitch to the top and bottom of the sleeve.
    • Placed the sleeve on top of the cup base and added a blanket stitch around the three sides (remember, the top will be covered with the lid.
    • Sandwiched the cup base between the two lids with a .25 inch overlap. Added a blanket stitch all the way around the lid.
  3. Slide your gift card into the sleeve!

I love how one pattern can create three very different results. Download the template, shop your stash and create your very own Valentine gift card today. I’d love to see what you create – use #50fundayfridays so we all can follow along.

Until next Friday – happy creating!


On turning 50

I had big plans to celebrate my half-century mark that included an epic trip, family, friends and lots of balloons. Because I firmly believe it’s not a party without balloons. Turning 50 during Covid certainly changed these plans, (although I did have my loved ones and lots of balloons). But I still wanted to celebrate it in a epic way.

I’ve had about nine months to reconsider how to celebrate and I’m excited to finally share a few of my BIG ideas. Instead of a 10-day trip with my loved ones, I’m celebrating ALL YEAR. Heck, yeah!

Throughout the year I’ll be launching different projects and sharing my adventures here  as well as on my social media platforms. I’m pretty active over on Instagram with my creative/business account (@kellywatermancreates). I don’t always share all the content up to Facebook so, if you’re really keen to follow along with all the fun, be sure to follow on IG.

My intention is to spread happiness, joy, inspiration, and to CELEBRATE all the good. There is so much good my friends! And I think we can all use a little reminder as we close the door on 2020 and look forward to the possibility of a brand-new year. And in my case, a brand-new decade. As such, I will be completing (at least) 5 projects (one for each decade) that has 50 parts, steps, elements, pieces…you get the idea.

Kicking off this month:

    • 50 kindness kits
      My plan to send 50 kindness kits is totally inspired by the lovely Sandi Keene and Rae Missigman‘s Painted Paper Project (If you don’t already, do yourself a favor and follow them NOW.) I signed up for their free workshop last fall and immediately knew I wanted to incorporate this theme of spreading joy into my 50th birthday year. I’m so excited to FINALLY be able to start mailing thoughtfully created packages to spread a lotta love in celebration of 50 years of relationships and connection. The Painted Paper Project is actually what inspired me to have a year-long birthday extravaganza!  I will be creating 50 kindness kits to send to folks who have been there for me over the years, who have made me laugh, cheered me on, and/or inspired me in some way. These little random acts of kindness will help me connect with people who inspire me in a time when traveling to say “hello” is limited. Follow along on Instagram as I create all the little bits and pieces – and push myself creatively with watercolor, collage and ink.
    • 50 funday Fridays
      Fridays will get kicked up a notch in 2021 as I share tips, tutorials, videos, freebies, flash sales and more! Woot! There are no rules, really, except to have FUN. (Party hats are optional.) If you’ve followed me on my personal account for the last several years, or on my creative account for the last few months, you know I like to dabble in several different creative mediums. Funday Fridays will explore all of these as I dive into learning new things and sharing this adventure with you.

I’m super excited for this this year-long celebration and for what’s to come. And I’m so glad you’re here to celebrate with me.

Here’s to an awesome, creative 2021!