Hello friends! It’s Friday and that means it’s time to put on your party hats and kick up the fun.
Let’s talk Galentne’s. Yep, ya heard me: Galentine’s let’s face it, February 14 isn’t just for Cupid and romance. It’s a time to celebrate love and kindness and friendship. Your gals. Your pals. Your tribe.
And let’s really face it: if I made a sweet little Valentines like one of these for my hubs he’d be l ike “Uh. It’s cute?” Right?
I am taking a handmade journal class with Wendy Schkolnick Solganik (@willa.wanders over on Insta) and have been introduced to the wonders of Pellon 72F double-sided fusible stabilizer. I’ve been using the lightweight double fusible interfacing for appliqué for the better part of a year now, but this stuff is super thick and well, stable. (Amazing how that works!) While I bought it mostly to make a journal cover, I thought it’d be fun to try using it for other things. Like some Valentine’s.
Here’s what you’ll need if you want to follow along:
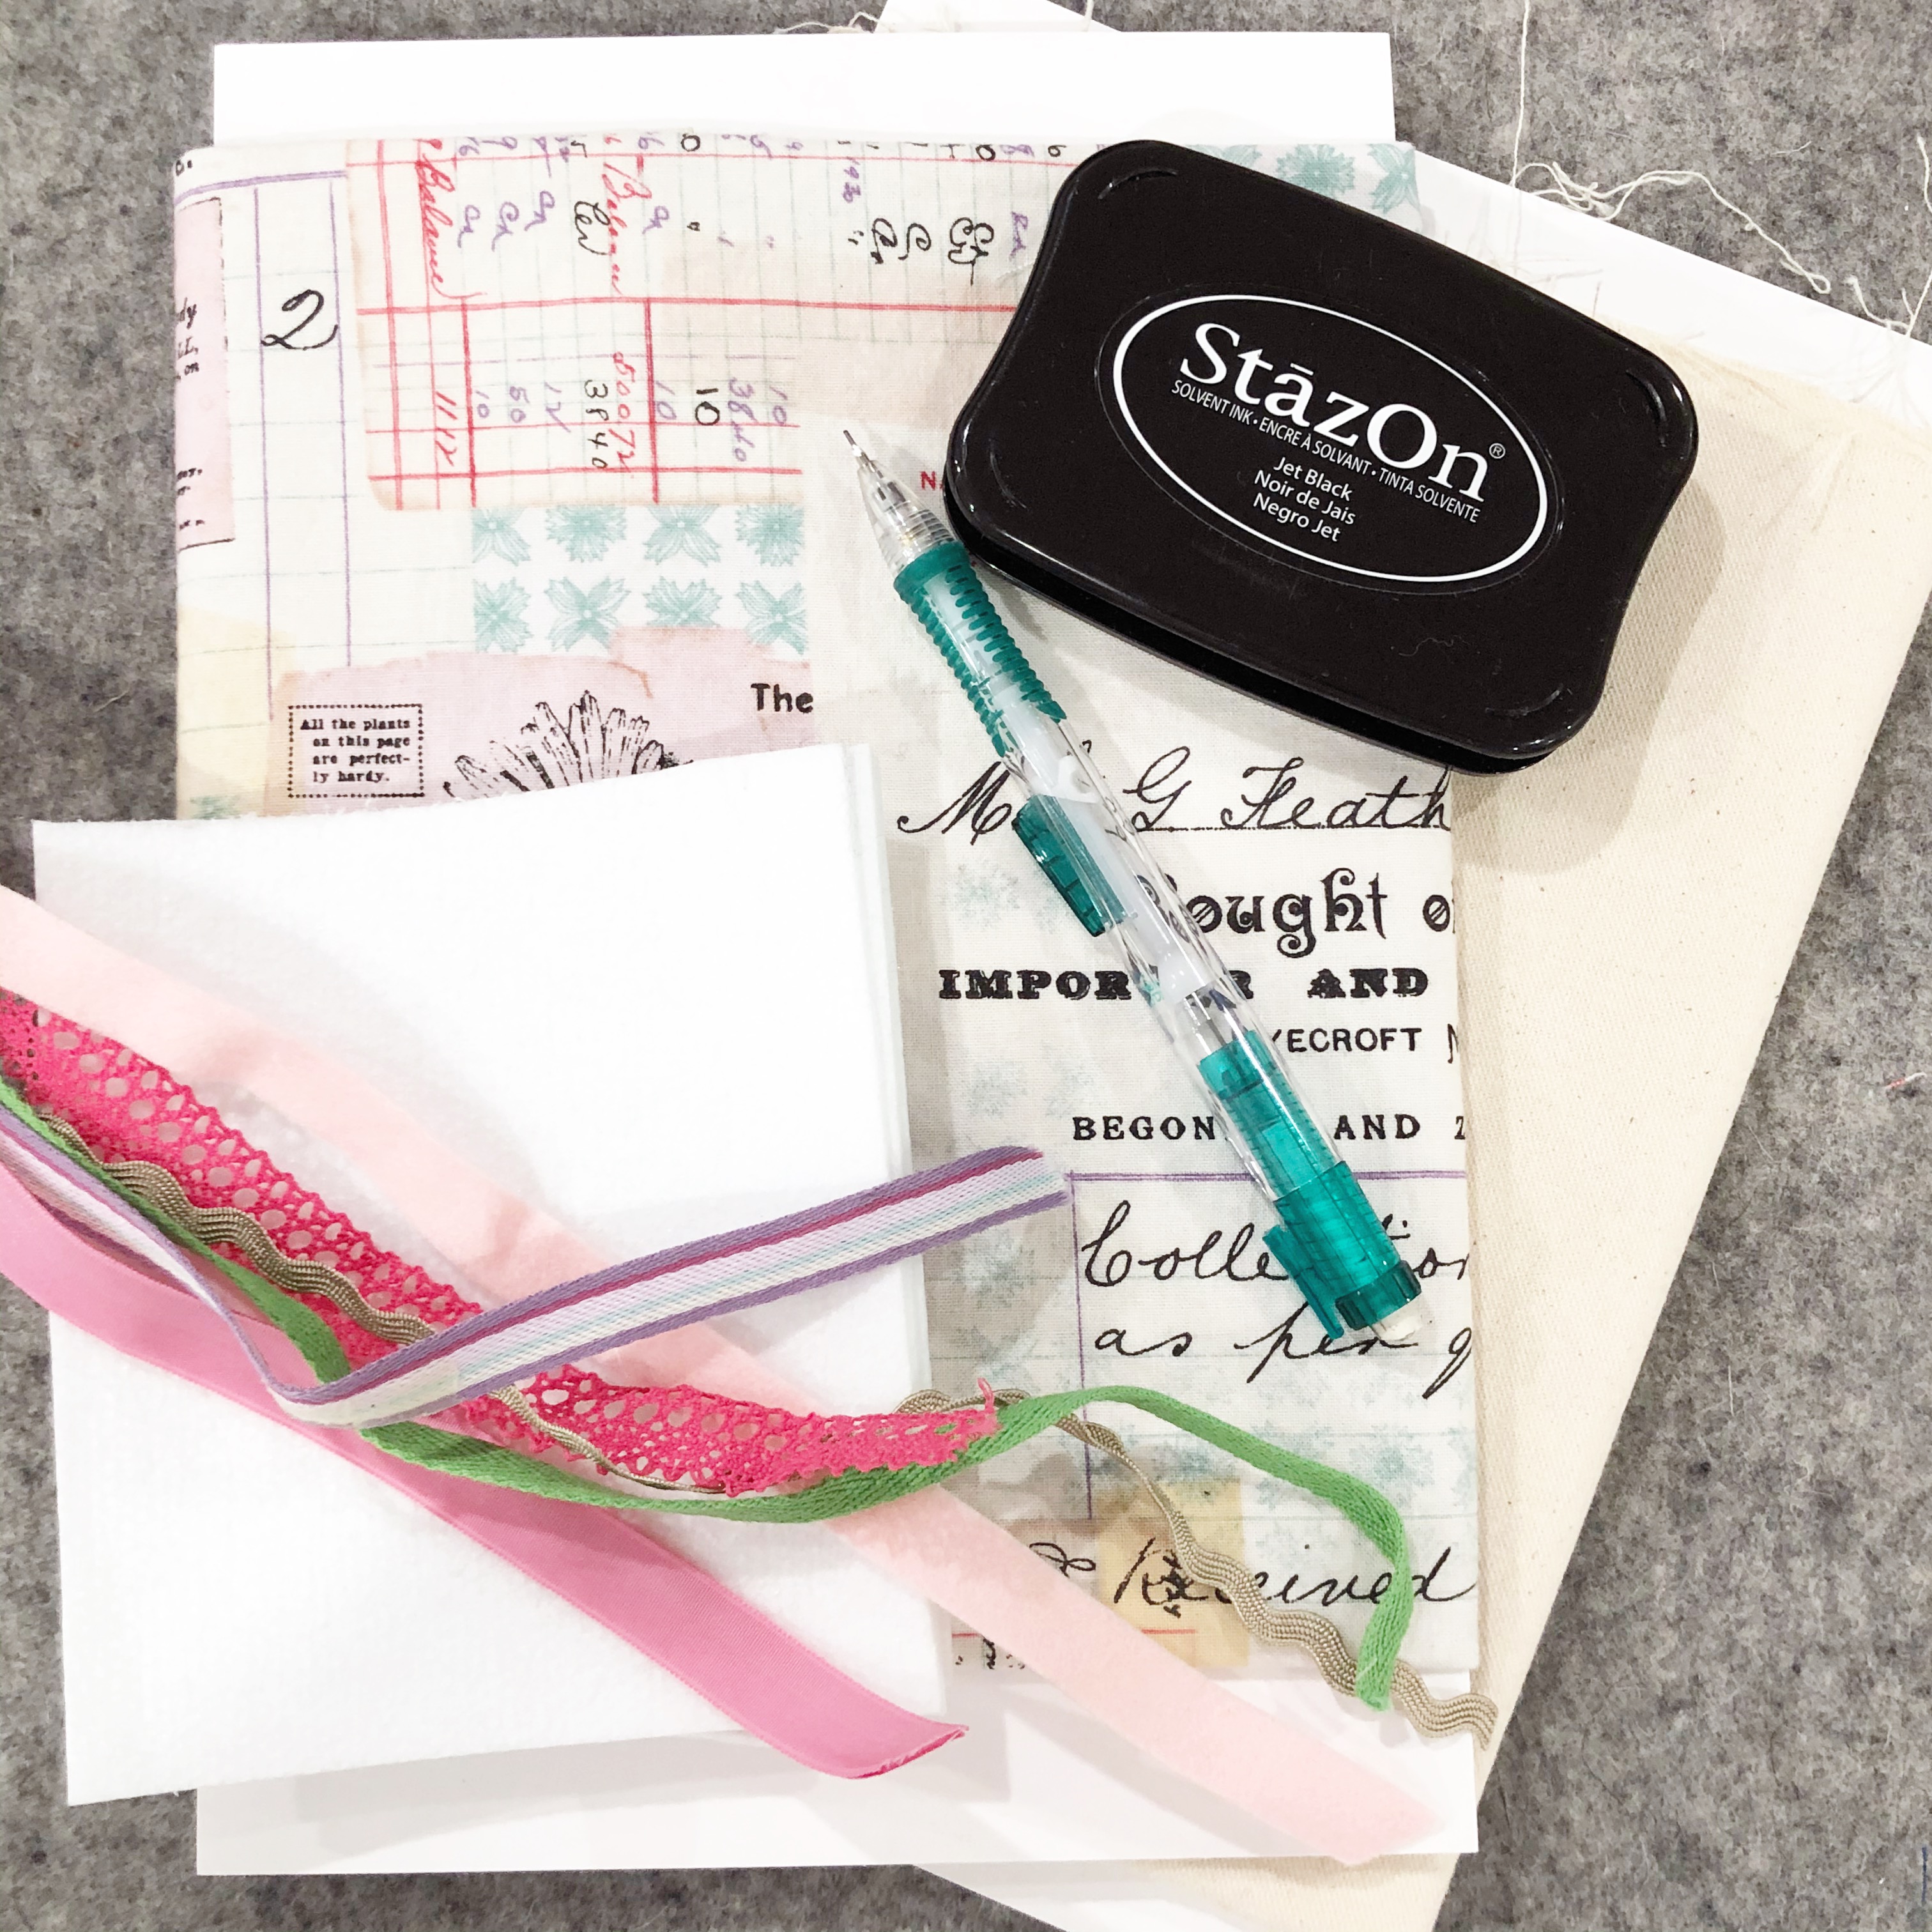
-
-
- Fabrics for the scrappy top
- Fabric for the back
- Fabric to stamp
- stayzOn ink – or other permanent ink
- Pellon Peltex 72F double-sided fusible stabilizer
- Pencil
- Scissors
- Iron
- Buttons, ribbons, etc. to decorate
- Sewing machine or needles and thread to hand stitch
-
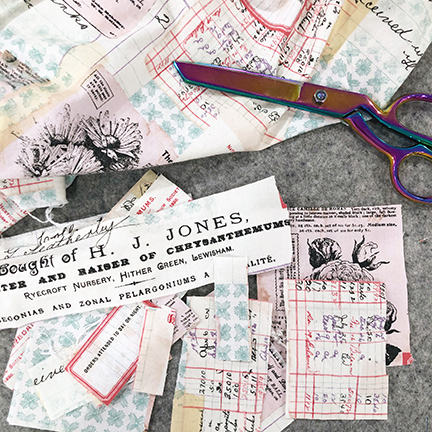
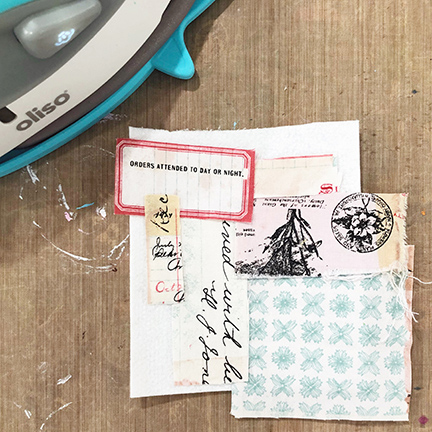
I bought this vintage-looking fabric last year to make some masks with and never did. If you know anything about me: you know that I’m more of a bright and happy colored kind of girl. But peeps, my soul wants to soft and vintage-y and dainty. So I bought this fabric….and the promptly didn’t make it into anything. It’s PERFECT for this project however. I did want a scrappy look, so even though the fabric looks like several little pieces of fabric together, I decided to cut it up so that I could stitch it back together.
Let’s take a look at the process:
- Cut a few squarish shapes from your Pellon (mine were about 4 inches x 5 inches).
- Draw a heart shape on one side as a template for you to cut later.
- Take your fabric scraps and arrange it in a pleasing design and iron in place. A few notes:
- I laid this out on the side where I didn’t draw a heart so I could cut it after I stitched the pieces together.
- I overlapped my pieces a bit to make sure that I didn’t have any exposed pieces of Pellon showing after I ironed it.
- I ironed on my kraft mat because the Pellon is double-sided fusible. If you don’t have a craft mat like this, you can use freezer paper – something to ensure that you don’t stick the Pellon down to your ironing board.
- Stitch the pieces together using decorative stitches. I used my free-motion embroidery foot on my sewing machine. You could also use decorative hand stitching.
- Cut the heart shape out.
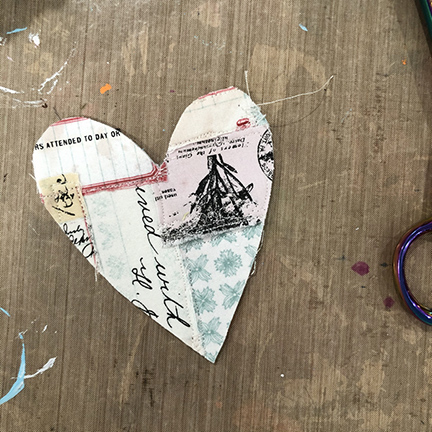
- Iron your backing fabric on to the heart. I did stitch once all the way around to secure the backing fabric.
- Trim the excess backing fabric.
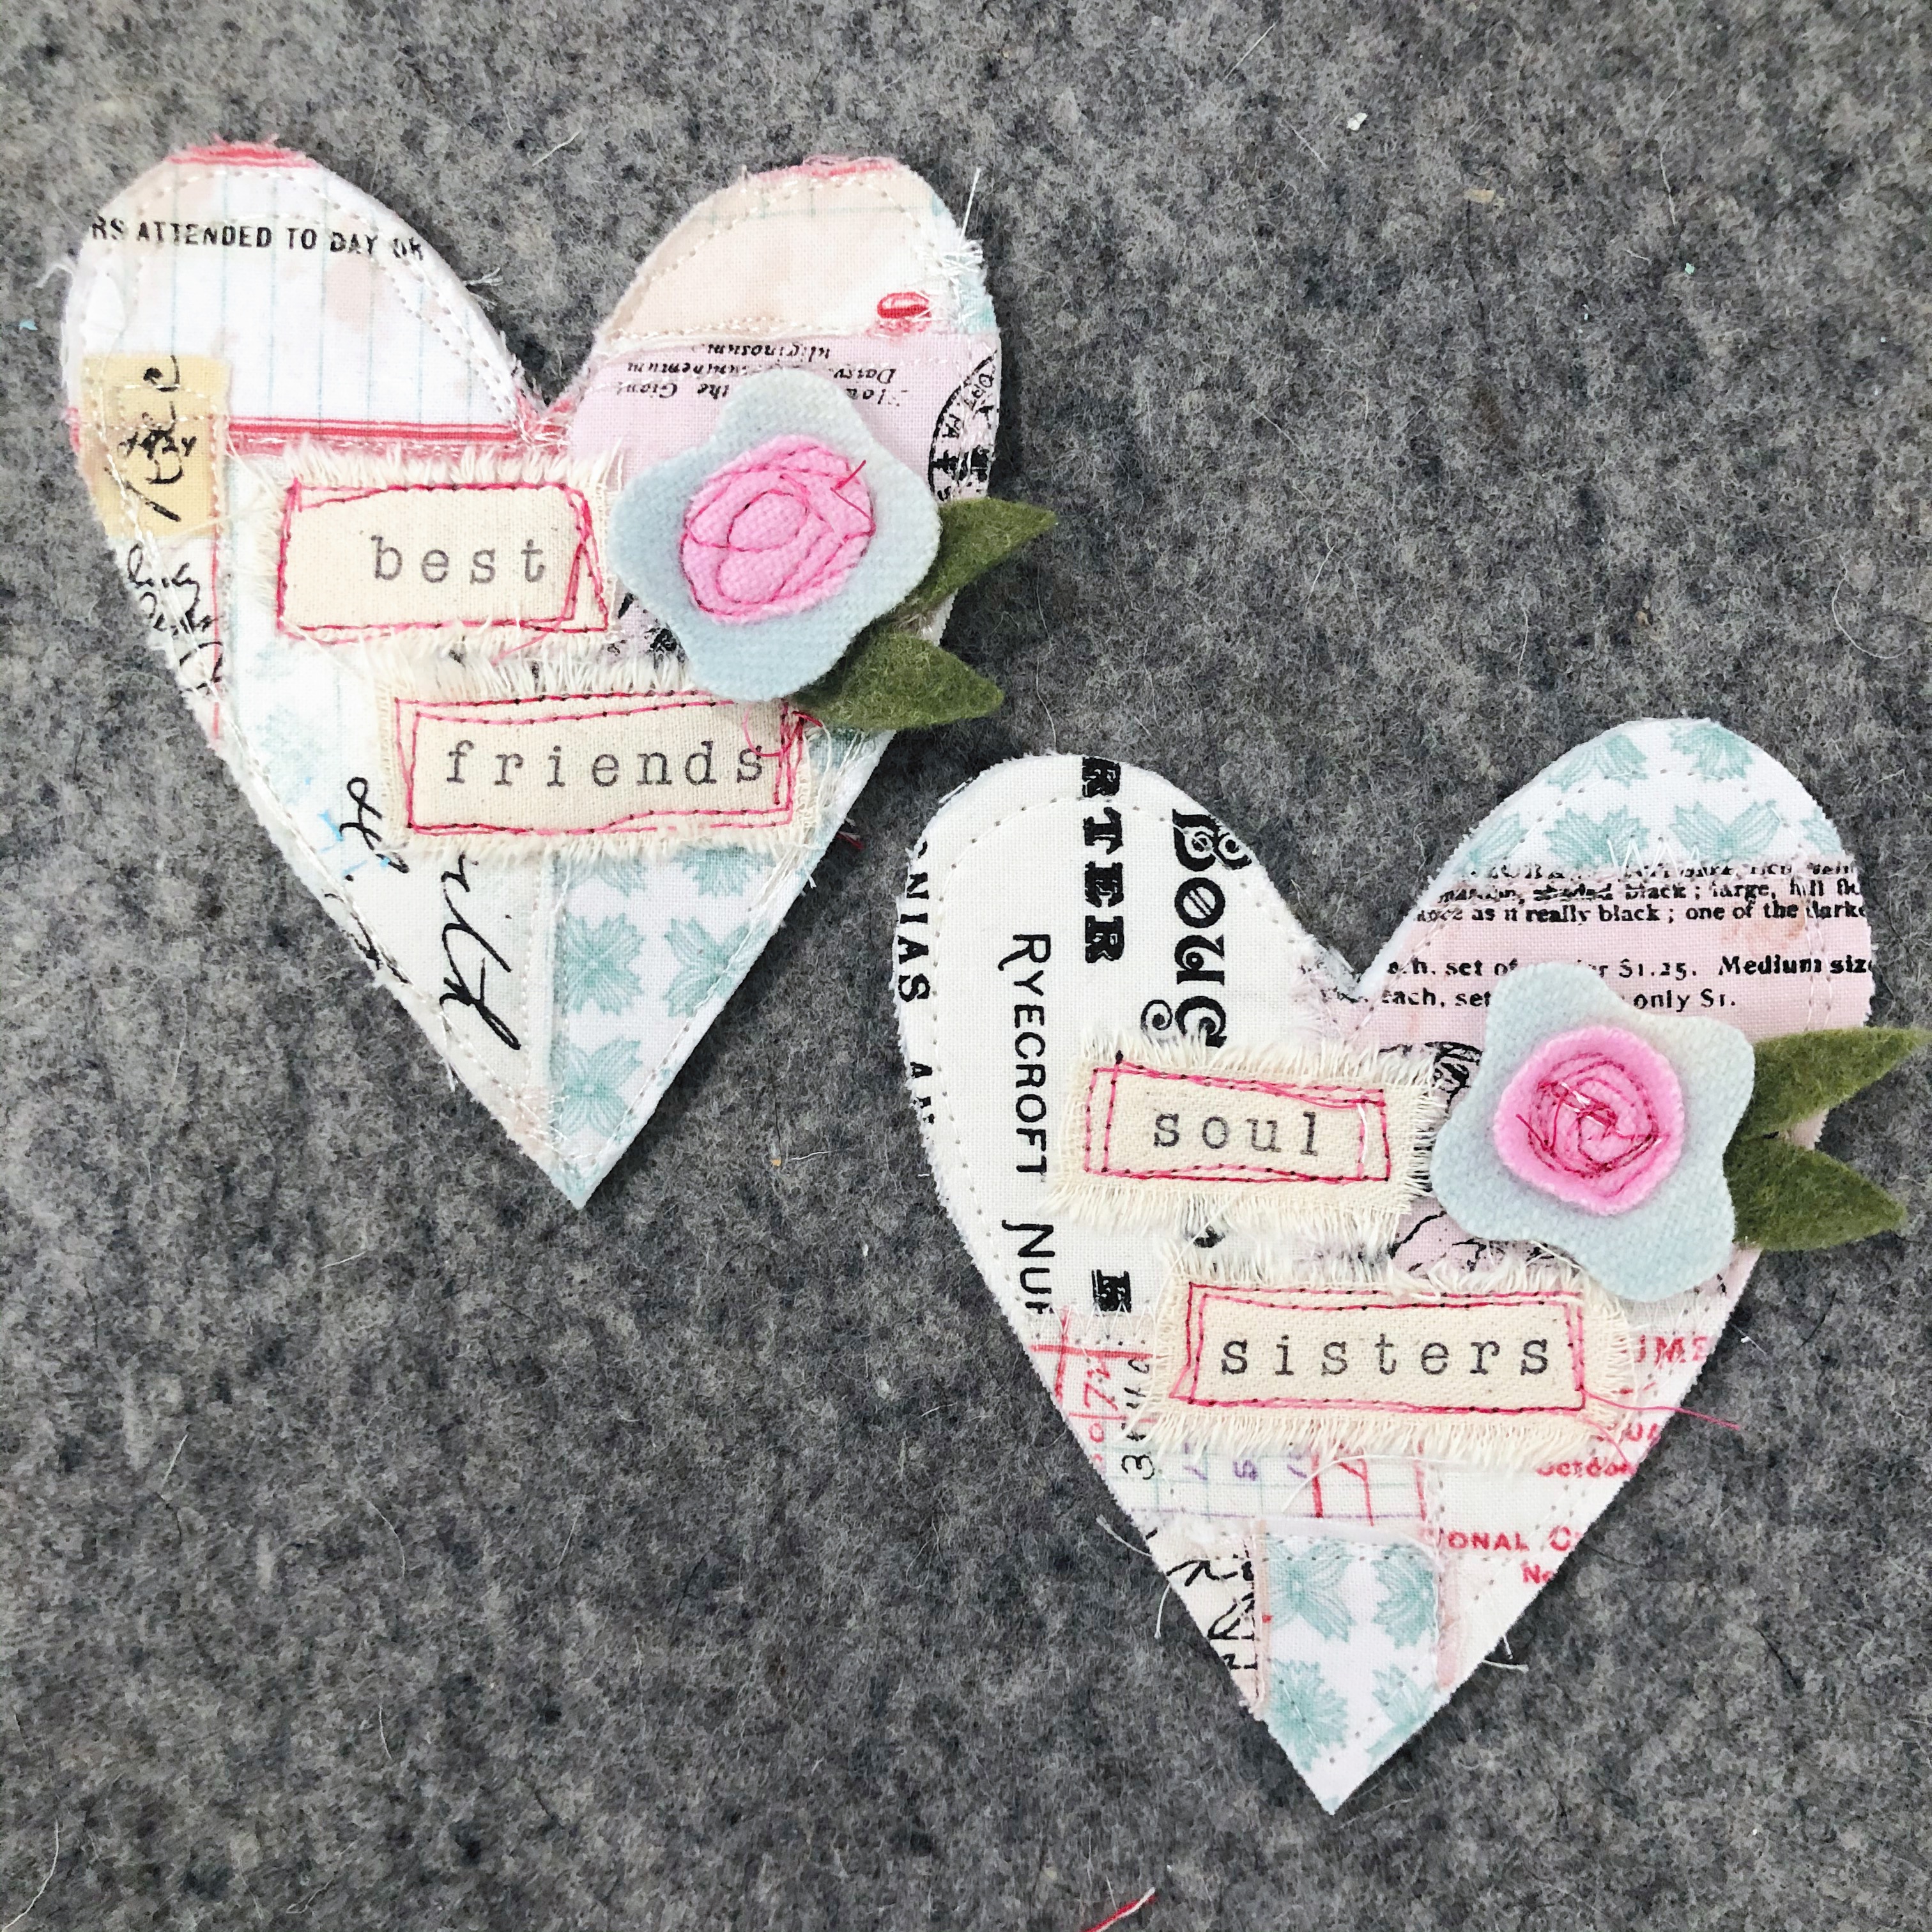
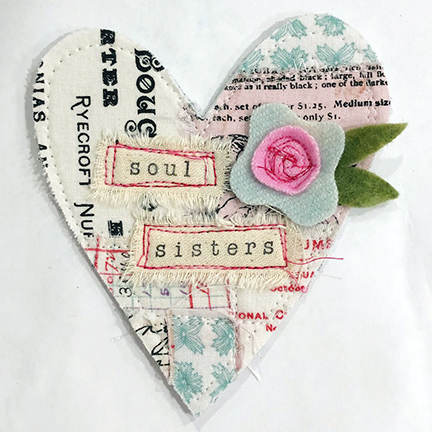
- Embellish how you like. Here’s what I did:
- I took some duck cloth and ripped it to get those lovely frayed edges
- Using StazyOn ink, I stamped some sentiments directly onto the fabric.
- I stitched them to my heart using a contrasting thread. (Truth be told, I wish I had done this all over. I was trying to go for that calm, simple, scrappy vibe. But I’m fighting my desire to see that messy doodled line here!!)
- I created a little felt flower to add to the heart as well. To attach, I crazy stitched the center of the flower.
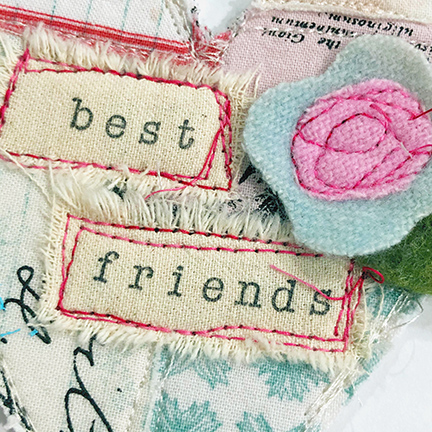
- You could add trim, pins, buttons – get creative!

Hope this inspires you to create something sweet and fun for all the lovely ladies in your life whom you appreciate. Until next time – happy creating!